This section assumes you have already added Console.Waterworks.Core (C.W.C.) to your project. If you have not, please review the following page:
Once you have added C.W.C. to your console project, you can begin using it. One thing to note with C.W.C. is how invasive it is. Because it has taken a lot out of your hands, it requires your project to look a certain way. The first thing you need to do is create a file called "ConsoleCommands.cs". When you have done that, make a note of the file/classes name-space -- you will need it in a little bit. When you have do that, head over to the Main method in "Program.cs" and enter the following code into it,
// Do not forget change the ConsoleCommands name-space in Run.
var liaison = new CW_Liaison();
liaison.Run("YOUR CONSOLECOMMADS.CS NAME-SPACE GOES HERE.", true);
After you have done that, Visual Studio should start complaining about using statement This means you will need to add the following line of code with your other using statements,
// Place with your other using statements in Program.cs.
using Console.Waterworks.Core
Overall, your Program.cs should look similar to the code below,
using Console.Waterworks.Core;
using System;

namespace CW_Core_Console // This will differ in your project.
{
    class Program
    {
        static void Main(string[] args)
        {
            var liaison = new CW_Liaison();
            liaison.Run("CW_Core_Console", true);
        }
    }
}
You might need to decorate you Main function with the [STAThread] attribute. If Visual Studio starts complaining about "single-threaded/async. problems", add the [STAThread] attribute above your Main method.That should fix the problem.
When that is done, head back to ConsoleCommands.cs and you can begin adding your first command-method. I will not go into too much detail about command-methods just yet. The focus of this page is to get you set-up.
The first thing you need to do is make sure the ConsoleCommands class is marked as public and static. After that, enter the following method to your class,
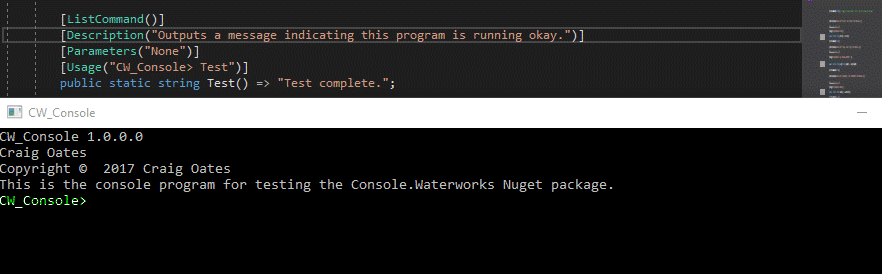
public static string Test()
{
    return "Test complete."
}
When you have done that, your ConsoleCommands.cs file should look similar to the following code snippet,
using System;
using Console.Waterworks.Core;

namespace CW_Core_Console // This will be different to yours.
{
    public static class ConsoleCommands
    {
        public static string Test()
        {
            return "Test complete."
        }
    }
}
If all has gone well, your program should run (press F5) and when you enter "Test" into the console, you should see something similar to the image below.
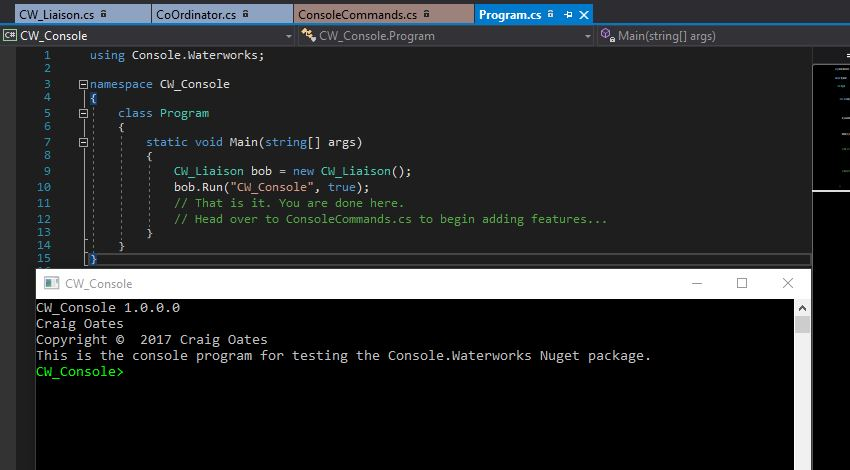
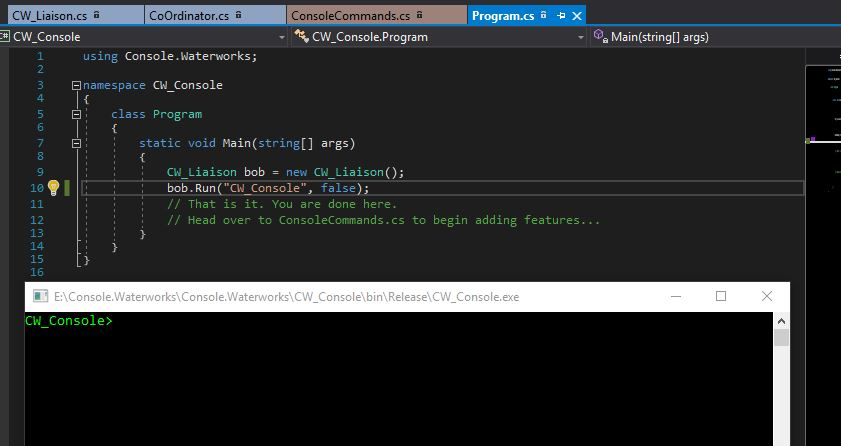
Within the Main function is a method called Run, which takes two arguments. The first is the name-space of the ConsoleCommands class and the second one is a bool. In the example above, I have used true but I could have used false if I wanted. The reason I used true is because I prefer my console programs to display its assembly information when I run it. If you prefer just the prompt, change the true variable to false. If all has gone well, you should see something similar to the screenshots below.
Console program, displaying its assembly information.
Console program, displaying just the prompt.
I will not go into too much detail about changing a project's assembly information because there is already an amble amount of information on the subject. Instead, I will provide the following links to get to started:
- Setting Assembly Attributes: This applies to the traditional and Core versions of .Net. It provides information on what resides in Assembly Information manifests and files.
- How to Target a version of .Net: This provides extra context on the Properties page in Visual Studio and how it fits the Assembly Information dialog box into it -- from a traditional .Net angle.
The easiest way to get to the Assembly Information dialog box is as follows:
- In "Solution Explorer", open the right-click menu on the project (I.E. your console project) you want to change, and then choose "Properties".
- In the left column of the "Properties" window, left-click the "Application" tab.
- Left-click the button labelled "Assembly Information".

Table of Contents
- Home
- Introduction to Console.Waterworks.Core
- Overview of Console.Waterworks.Core
- Repository Breakdown
- Adding Console.Waterworks.Core to Your Project
- Wiring Console.Waterworks.Core into Your Project
- Overview of Command-Methods
- Writing Command-Methods
- Using the Help Attributes
- Referencing Other Projects in Yours when Using Console.Waterworks.Core