12 KiB
Return to Ritherdon: Midpoint
Midpoint is one of three smaller projects which make-up 'Personal Flash in Real-Time' -- which is one artwork within the main 'Return to Ritherdon' project. You should view the three smaller projects as one project. And, for the purpose of this documentation, I will refer to 'Personal Flash in Real-Time' as a system instead of an artwork.
For more information on the 'Return to Ritherdon' project, use the following link:
'Personal Flash in Real-Time': Project Overview
The overall system ('Personal Flash in Real-Time') consists of three separate/smaller projects. You should not view them as individual pieces within the overall project. From an artwork point-of-view, 'Personal Flash in Real-Time' is one piece. The name of the software projects are 'Light Meter' (which is this one), 'Midpoint' and 'Relay'. All three projects reside in their own git repositories. You can find the repositories at the following links:
The (technical) aim of the project is to turn a set of lights on at the gallery when the welding machines are active in the welding booths at Ritherdon. The solution we arrived at was a three-stage process. The stages are as follows:
- Monitor the light levels in the welding booths at Ritherdon and send that information to a sever (Light Meter).
- Receive the light readings and store them in a database and make them available for others to access (Midpoint).
- Have the lights installed at the gallery connected to wi-fi enabled relays which request the latest light readings from the server. If the readings are above a certain threshold, have the light in the gallery turn on (otherwise, turn off). The relays are responsible for turning the lights on and off (Relay).
Each step should require no human intervention.
For more information on how each project accomplishes its task, please use the (repo.) links above. Otherwise, here is an diagram to help explain the three stages mentioned above.

Hardware Specifications
There are no specific hardware requirements. If you can get an machine to run a server (E.G. Nginx or Apache), you should be good to go. Unfortunately, the scope of the project meant the amount of support for hardware and software is limited to an x86 Linux based machine running Nginx. I decided to run a virtual machine on Amazon Web Services.
- Amazon Web Services (A.W.S.)
Software Requirements
I have set-up the server to run on Linux (I.E. Ubuntu) with an Nginx server -- on an x86 machine. Any other variation on that (I.E. Windows), you will be on your own. The reason why is because I have not tested it. How you acquire the hardware is up to you. For the intents of the project, I used a virtual machine on Amazon Web Services. Links for various parts of the set-up are below:
- https://ubuntu.com/
- Nginx
- Python Flask
- Gunicorn
- Supervisor (Python)
- SQLite Database
- SQL Alchemy (O.R.M.)
- Swagger REST API
Software Set-up
Below is an overview of the files and directory structure.
app/
├── api.py <-------- REST API entry point.
├── app.py <------- 'Main' program entry point.
├── build_database.py <-- Builds database (use first).
├── config.py <----- Program config's for Flask and Swagger.
├── models <-------- Objects which database rows are mapped to.
├── __pycache__
├── readings.db <--- The SQLite database.
├── services <------ 'Business logic' for api.py entry points.
├── static  <------- Images/Favicons/Style Sheets.
├── swagger.yml <--- YAML config. file for Swagger (REST API).
└── templates <----- HTML views.
The Program (Python and Virtual Environment)
I have omitted instructions on creating user accounts beyond the defaults because that comes with a fair bit of context specific information which is beyond the scope of this documentation. On top of that, the project's budget did not allow for extended research on various Cloud Platforms and server architecture, in-general.
After you have established a V.M. on A.W.S. or your own server, you will need to clone the repository (I am assuming this is via SSH).
# Adjust the directories to how you prefer it. These are just my defaults.
mkdir www
cd www
git clone http://git.abbether.net/return-to-ritherdon/midpoint.git
cd midpoint
From there, you can create a Python virtual environment if you prefer
to keep things isolated. You can ignore the virtual environment step
and install the requirements at a system-wide level. If you do that,
you will need to use pip3 instead of pip.
# Adjust the path to suit to environment.
python3 -m venv ~/repos/midpoint/venv

# Install the requirements...
(use pip3 if you're not using a virtual environment)
pip install -r requirements.txt
As an aside, I created a virtual environment with python3 -m venv ~/www/midpoint/my-env whilst in development. This environment might
still be around the production server, used during the
exhibition. If you are completing a fresh install, this is not
relevant to you. Please ignore.
The Server
The host name for the server used during the exhibition was
piapi. So, I will use that in the documentation below. Please make
sure you replace piapi with the host name you are using.
I used Nginx and Gunicorn for the exhibition so that is all this documentation will focus on. Midpoint should work on other servers (like Apache) but I have not tested it.
The Nginx configuration file is located at:
/etc/nginx/sites-enabled/piapi
You can access the file with sudo nano /etc/nginx/sites-enabled/piapi when logged into the server.
Because Nginx is responsible for the static side of the website, Gunicorn is needed to operate the Python side of it. Nginx knows how/when to pass control over to Gunicorn because it is configured in the … sites-enables/piapi configuration file (mentioned above). With that said, Gunicorn still needs to be set-up for everything to run properly. It is worth pointing out, the "static" part of the site will still run when Gunicorn is not running but that is a practically useless feature. To run Gunicorn, enter the following command into the terminal (of logged in V.M),
# You can adjust the '-w 3' if you have a more powerful server. Also,
the 'connext_app' related to the use of the Swagger API code.
gunicorn -w 3 server:connex_app
The -w 3 bit refers to the total number of workers (processors)
Gunicorn will use whilst running. The general rule to work that out it
/(number of processors * 2) + 1. At the time of writing, the virtual
machine used for the exhibition is a very basic one-core machine so
that is why three workers is used.
One problem with Gunicorn is it blocks the terminal when using it in its default way. To get around this, I have install Supervisor to manage it. Supervisor handles the auto-restart after a crash and background-task management of it too. To install it, run the following command,
sudo apt install supervisor
When Supervisor is installed, you need to create a config. file. The file for this project is stored at,
/etc/supervisor/conf.d/spiapi.conf
The log files (specified in the .conf) file are,
/var/log/midpoint/midpoint.err.log/var/log/midpoint/midpoint.out.log
You will need to recreate the directory they are stored in if you are installing this site on a new system. The easiest way to do that is to run the following command,
sudo mkdir -p /var/log/midpoint
sudo touch /var/log/midpoint/midpoint.err.log
sudo touch /var/log/midpoint/midpoint.out.log
When you have finished making these changes, you will need to restart Supervisor. To do that, run the following command,
sudo supervisor reload
It might take a little while for the service to restart so if you still see "Bad Gateway" messages in the browser, that might be why.
You might find Gunicorn is not installed in the virtual-environment (if you have decided to not install one or you simply forget to activate like I have a habit of doing), it that is the case, you should find it at,
home/ubuntu/.local/bin/gunicorn
This might, also, mean you need to use apt and not pip3.
The config. file for Supervisor should look something like the
following, (remember to adjust the places where ubuntu is with your
servers account name -- if it differs from ubuntu)
[program:midpoint]
directory=/home/ubuntu/www/midpoint/app
command=/home/ubuntu/.local/bin/gunicorn -w 3 server:connex_app
user=ubuntu
autostart=true
autorestart=true
stopasgroup=true
killasgroup=true
stderr_logfile=/var/log/midpoint/midpoint.err.log
stdout_logfile=/var/log/midpoint/midpoint.out.log
The config. file for Nginx should look like the following,
server {
    listen 80;
    server_name 35.176.235.94;

    location /static {
        alias /home/ubuntu/www/midpoint/app/static;
    }

    location / { proxy_pass http://localhost:8000; include
                 /etc/nginx/proxy_params; proxy_redirect off; } }
I did not set-up the server to use HTTPS because it was outside the
scope of the project. Again, replace ubuntu with your servers
username.
Flask & Swagger
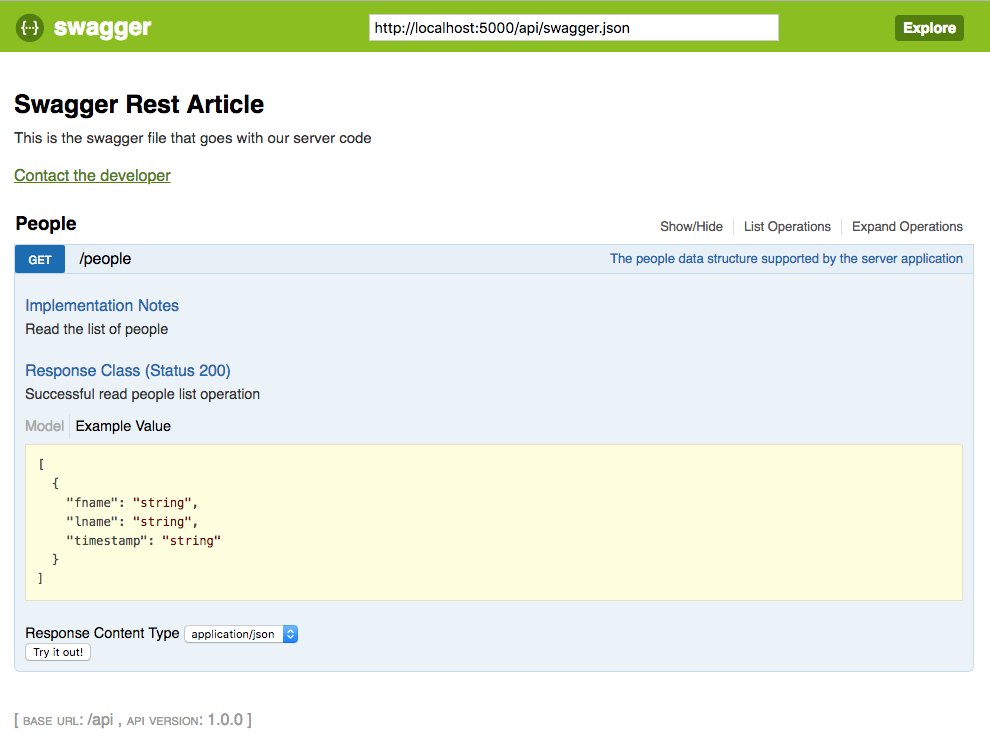
To access the A.P.I. user-interface (via Swagger), enter
-http://0.0.0.0:5000/api/ui/
Real Python provides a good walk-through for setting-up a website using the Flask framework. Real Python, also, provides guides on creating websites with Python and its various website frameworks.
I have imported the connexion project into this one. By doing this,
I can use Swagger and its U.I. When you have the server running, go to
localhost:5000/api/swagger. When there, you can test the A.P.I. out
by sending it "gets" and "posts".
The Swagger endpoint are configured in a YAML file at,
Database and O.R.M.
The project uses a SQLite database to store light reading and any device status updates. To write to the database, I used SQL Alchemy as a Object Relational Mapper (O.R.M). The database is called,
readings.db
Before you can start the program, you will need to build the database. To do that, you will need to run the following commands,
# Make sure you are in the 'app' directory. Adjust the 'cd' path to
# match your set-up.
cd ~/www/midpoint/app/

# If you have created and activated a virtual environment, you can
# enter 'python' instead of 'python3'.
python3 build-database.py
This will clear the database if one is already set-up and then build a new one.
Notes on System Limitations
1. Connection Times-Out on Large JSON Packets
The biggest thing to remember the REST API calls which grab 'all' the light readings from every device, will start to fail fairly quickly after a 'clean install'. The reason why is because the JSON package becomes too large and the connection times out. You might get better results on a more powerfully spec'd server than the one used for the exhibition but I have not tested this so I cannot confirm this.
2. Three Light-Meters and Relays Specified but Only Two (of each) Used
Ritherdon (the factory) has three welding booths so 'Personal Flash in Real-Time' was designed with this in mind. Over the course of the development process, the use of the third booth was not needed/wanted. By that time, the code, database and models had already been created. I decided to opt for the lazy option and keep the references to the third booth instead of removing it because it was not impeding on the system in any way. I was, also, cautious about the chance of a change happening late into the development cycle were I would need to put it back it.